Are you ready to transform your home’s exterior but worried about the complexity of aluminum Siding Installation? Look no further. At Utah Siding & Exteriors, we specialize in making the daunting seem doable. In this step-by-step guide, we’ll walk you through the process, empowering homeowners to achieve professional results. Let’s dive right in!
Understanding the Benefits of Aluminum Siding
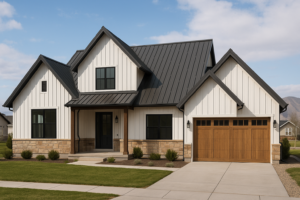
Aluminum siding offers a fantastic balance of durability and aesthetic appeal. It’s lightweight, resistant to fire, and it doesn’t rust. This makes it a superb choice for long-term home improvement plans. Not to mention, it comes in a variety of colors and styles to fit every homeowner’s taste.
Additionally, aluminum siding is energy-efficient, reflecting heat away from your home during summer months. Consequently, it helps in maintaining a comfortable indoor temperature, potentially reducing energy bills. Understanding these benefits is the first step to appreciating why this material is a homeowner favorite.
Preparation: The Key to Success
Before diving into the installation, proper preparation is crucial. First, gather all your materials including the aluminum siding, nails, and tools. Confirm you have enough siding to cover the complete surface area by measuring your walls meticulously.
Next, check the walls for any damage, mold, or protruding nails. Fixing these issues ahead of time saves you from headaches later. Also, remove any old siding if necessary and make sure your walls are completely dry before you begin. By laying a solid foundation, your project will proceed smoothly.
Measuring and Cutting Aluminum Siding Accurately
Precision matters. Carefully measure each section of your home where the siding will be installed. Record these measurements and add a small allowance to account for any errors.
Using high-quality snips or a specialized cutter, proceed to cut the aluminum siding according to your recorded dimensions. Double-check your measurements to ensure they match the actual dimensions on your house. Remember, it’s easier to trim excess material than to extend a piece that’s too short!
Installing the Starter Strip
The starter strip serves as the foundation for your aluminum siding installation. Attach this strip at the bottom of the wall, ensuring it is perfectly level. Consistent alignment is critical to the final look of your exterior.
Secure the starter strip with nails, making sure they’re driven into the wall studs for maximum stability. Check again to confirm it’s level after nailing. This step serves as the baseline for the rest of your siding panels.
Application of Aluminum Siding Panels
Start from the bottom and work your way up when applying the siding panels. Slide each panel into the starter strip and secure it with nails through the pre-drilled holes along the top edge.
Ensure each panel locks tightly into the preceding one. To avoid bowing or warping, do not overdrive the nails. Keep a slight gap to allow the metal to expand and contract with temperature changes.
Tackling Corners and Trim
Corners require special treatment. Install corner posts at all external corners, as they help hide the edges of the siding panels. Secure them similarly to the starter strip.
For window and door trims, use J-channel to create a clean, professional finish. This trim will not only enhance your home’s aesthetics but also provide additional protection from moisture penetration.
The Importance of Overlapping Seams
When installing aluminum siding, seams between laps should be strategically staggered to avoid patterns. This enhances durability and visual appeal.
Make sure each overlapping section is not too tight to maintain flexibility after installation. Properly overlapped seams prevent water infiltration, ensuring the siding’s longevity.
Professional Tips for a Smoother Installation
- Use Quality Tools – High-quality tools make a significant difference in the precision and ease of installation. Invest in a reliable set of snips and a power drill.
- Check for Level Frequently – Regularly use a level to check the alignment of panels. This prevents cascading errors down the line.
- Leave Expansion Gaps – Metals expand and contract with temperature changes. Leave small gaps to accommodate this natural movement.
- Pre-plan Your Layout – Before nailing down any panel, envision how it will fit within the entire layout. This helps avoid mistakes in cutting or alignment.
- Safety First – Wear safety gloves and goggles at all times. The installation process involves sharp tools and materials that can cause injury if mishandled.
Inspecting Your Work
Once installation is complete, step back and conduct a thorough inspection. Check for any loose panels, misaligned seams, or exposed nails. Rectify these issues promptly to prevent future problems.
Also, inspect the trim and corners for tight fitting and clean lines. Proper inspection ensures that your new siding not only looks stunning but is also securely in place for years to come.
Maintaining Your Aluminum Siding
Maintenance is minimal with aluminum siding, but a little care can go a long way. Clean the surface annually using a mild detergent and a garden hose to retain its shine.
Inspect the siding regularly for dents or scratches, and use touch-up paint to correct any blemishes. By keeping up with maintenance, you’ll extend the lifespan of your siding and maintain its curb appeal.
Why Choose Utah Siding & Exteriors?
Opting for professional installation can save you time and potential headaches. At Utah Siding & Exteriors, we offer expert installation services, backed by years of experience and a commitment to quality.
Moreover, we provide free estimates, ensuring you get a clear overview of the costs involved. Our team of professionals is ready to transform your home’s exterior while you sit back and relax.
Contact Us
Ready to take the next step? Call us today by phone # 801-509-9241 or Request a Free Quote. Let’s get your project started with professionals you can trust.